With the gate frame done and the 1/2-in.-thick boards for the lower panel ready to go (go here for part 1 of this project), I was ready to assemble the whole door. Soon my awesome fence would have an awesome gate to keep my dog in! (Go here for the fence project.) That cool-looking upper grid would be too difficult to build before the door was together, so I saved it for later. I had a good plan for how to build it and hold it in place in its upper rectangle of space.
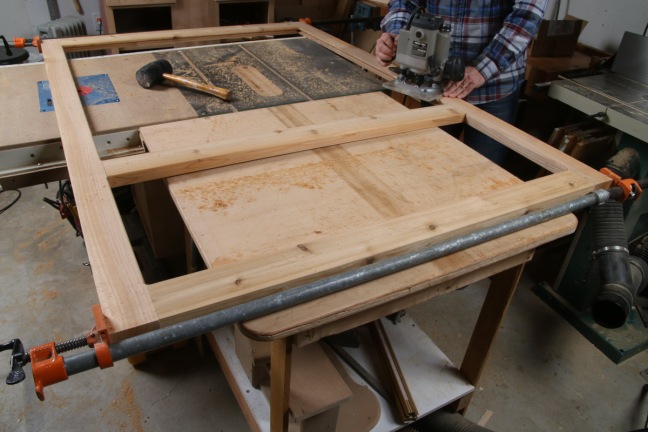
The first step for any glue-up is a dry fit, where you put everything together without glue, so you know all the joints will end up nice and tight and you have the clamps you need to get the job done. So let’s get to it.
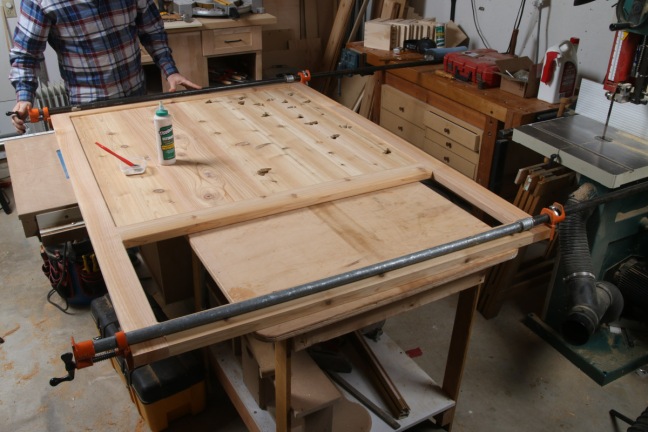
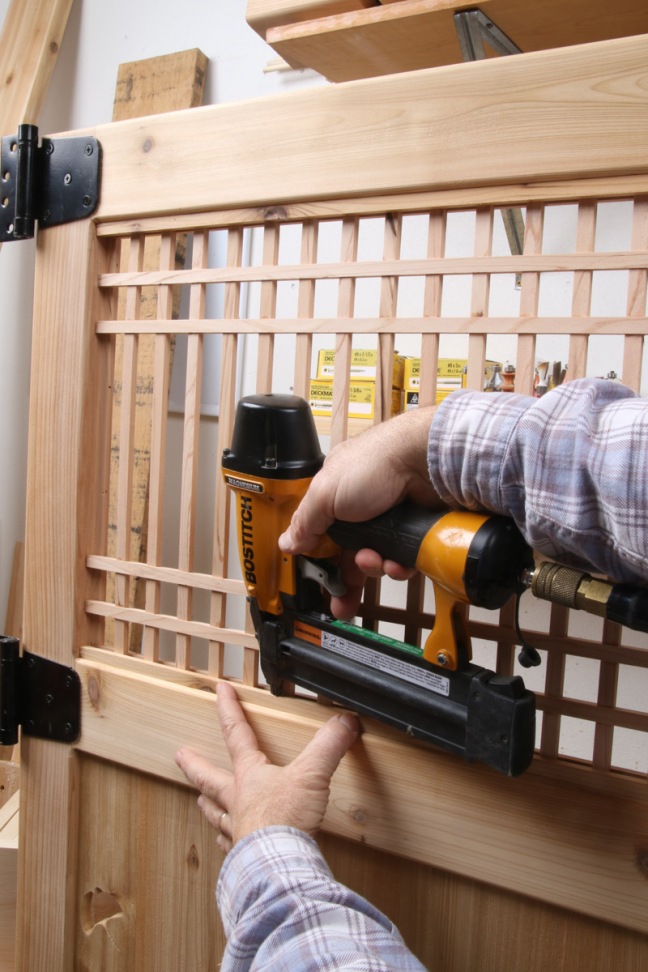
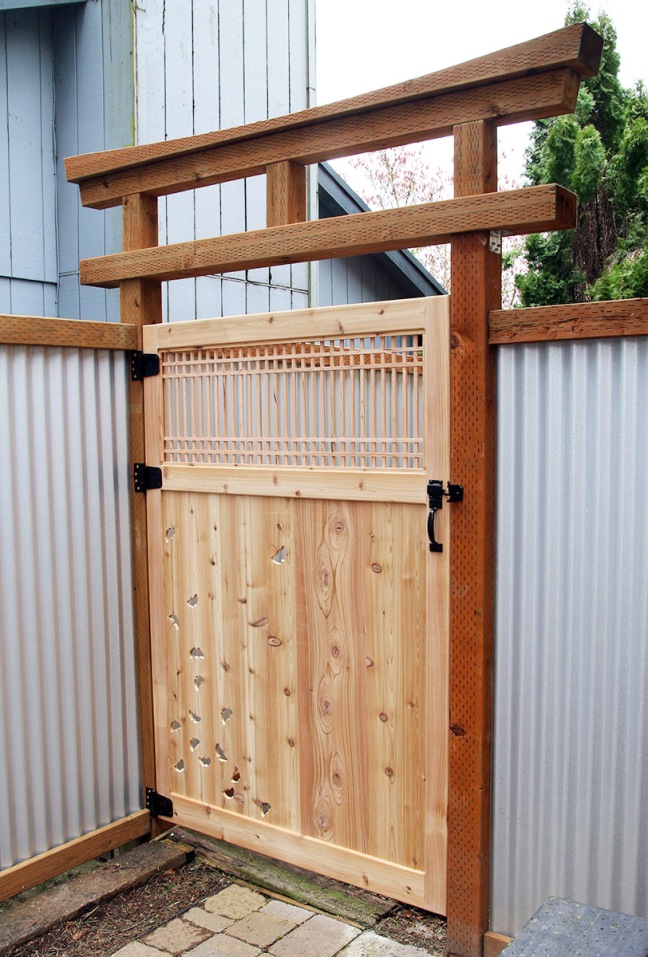
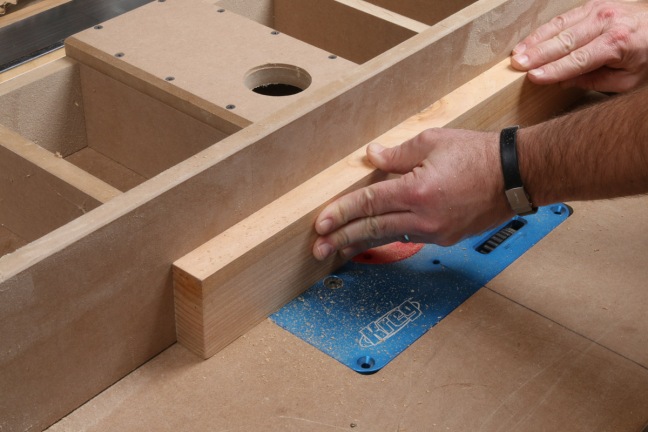
Mine is a big door, 4 ft. wide and 6 ft. tall, so I needed to use threaded connectors to extend my pipe clamps. Those let you use threaded plumbing pipe to make any length of clamp you need, using normal pipe clamp hardware that also screws on. I used the dry fit as an opportunity to rout the 1/4-in. roundovers on the inside corners of the frame. If I tried to do it when the parts were separate, it would be hard to know exactly where the horizontal rails meet the vertical stiles, and where I need to stop and start the roundovers.The first step before putting glue in the mortises (lots) and on the tenons (thin coat) was to insert the flat boards into the two lower rails. I popped a nail through the frame and into the top and bottom of each board, just to hold them all roughly in place as they shrink and expand through the seasons. If you really want perfection, you could mill tongues and grooves into the edges of the boards, or shiplap them, so no gaps ever appear later.Next I applied glue to all the joints and added the vertical stiles and the top rail, using the clamps to draw the pieces together. The nice thing about Titebond III, other than it being waterproof for outdoor use, is the longer working time it offers (at least 15 minutes) for tricky glue-ups like this one. Another good trick is squirting a bunch of glue into a plastic bowl like this one, so it is easy to brush on. When I’m done I just let the leftover glue harden, flex the bottom of the bowl, and pop it out. Before I made the upper grillwork, I nailed some thin strips into the back of the opening, which will serve to hold the grid in place. Those L-shaped plywood pieces act as temporary stops for these strips, so you know exactly where you are locating them.Here is the amazing tablesaw jig that is the key to all the little half-lap joints I needed. As you can see at left, the vertical pieces just need two little notches top and bottom. I did those with the miter gauge, using the rip fence as the stop. But the four long horizontal pieces needed a ton of notches in them, all perfectly spaced. For that I made this little sled that I clamped to the miter gauge. I dadoed an extra strip into the base as shown, as a sort of key. Then, once you cut one notch in a strip, that notch fits over the key, positioning the strip perfectly for the next cut, and ensuring even spacing all the way down the line.Because I made all the pieces just the right length, the whole grid dropped right into place, letting me nail some more 1/4 in. strips in front of it to hold it in place. If I ever have to remove it or remake it, I’ll just pry out those strips.The finished grid catches the light beautifully. Note that the horizontal strips are 1/16 in. thicker than the horizontals (5/16 vs. 1/4) to create nice shadow lines.I love the way the whole thing works together. It will be even nicer when the cedar weathers to a silvery grey, much like the color of the galvanized fence panels. Pay no attention to the upper hinge. The upper rail of the fence got in the way. Perfectly imperfect–that’s what I say.
When I replaced our old dilapidated wood fence with my own funky blend of wood and galvanized metal, I put a Japanese-style arch over the gate opening, planning to cook up an actual gate in the same style. I’ve learned not to rush the design stage, so I visited the excellent Portland Japanese Garden, took pictures of the gates I found, and also did some digging in Google images.
This gate, with falling ginkgo leaves pierced through the lower panel and a traditional Japanese gridwork pattern up top, is the result.
I’m now a proud owner of a PantoRouter, and I knew that the big, perfect-fitting mortises and tenons it produces would be perfect for my wide gate. Water and weather are hard on gates, and over the years they tend to sag. So I chose 1-1/4-in.-thick cedar for the frame, just thick enough to accommodate sturdy 1/2-in.-thick tenons but not an ounce heavier than it needed to be. I made all of the tenons the full 2 in. long that the PantoRouter allows. You probably don’t have that machine, so just make the the joints any way you know how.
Adding to the strength, I designed the rail widths for a single wide tenon in the two upper rails, and a two-tenon array in the wider bottom rail. A wider bottom rail also just looks good in a big frame-and-panel assembly, grounding it somehow.
All of this adds up to eight deep, thick mortises and tenons, four down each side of this wide door, plenty to keep it square over the years.
The details are up to you
I won’t go through every mortise-and-tenon step, but once you know how to make a big sturdy frame like this, you can design any gate you like.
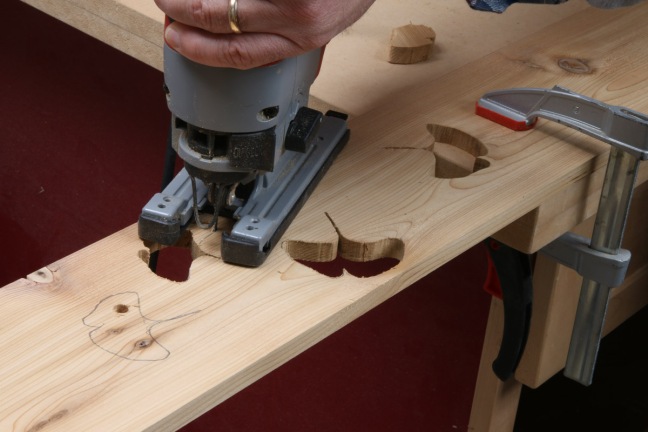
I my case I filled the lower frame with 1/2-in.-thick cedar boards. Those are lightweight and would be easy to pierce with the ginkgo leaf pattern I had in my head. You can see how I did the leaves below. I didn’t want gaps to appear between the boards over the years, so I fired a brad through the frame into the end of each board, top and bottom. A single brad or finish nail will do in each spot, letting each board shrink and expand without moving around much.
In the next part, I’ll show you how I glued up the gate and made that cool grillwork for the top. It was a real blast working with those tiny pieces.
There’s the beauty, now here’s the how-to:
I used single tenons in the two top rails.The PantoRouter nails the fit with no fiddling.I managed to fit two tenons into the lower rails. Again the PantoRouter is awesome, making double mortises and tenons as easily as single ones.
To accommodate those boards that make up the lower panel, I needed to cut grooves in the vertical frame parts, from the lower mortises to the middle ones. I went 1/4 in. deep with two passes, to get a 1/2 in. deep grooves.Bingo.The lower and middle rails needed grooves too.Bingo bongo.I found nice silhouettes of ginkgo leaves on Pinterest, scaled them on my printer, glued them to some cardboard, and cut out these two templates, which are slightly different sizes.Then I laid out the boards in their actual array, and played with the templates until I had the falling, windblown array I was going for.Enter my trusty jigsaw. To make it around these tight corners and curves, I dropped in my narrowest blade.Just drill holes for access, and make a series of cuts to shape each leaf.Sandpaper is the great fixer. I wrapped some 80-grit around a dowel to smooth out the bumps and tight curves. I also sanded away the whiskers at the edges. Stay tuned for part 2!